2024/11/23(土) [n年前の日記]
#1 [blender] blenderでobjをエクスポートした際の色を補正
_昨日
の続き。blenderから Wavefront形式(.obj .mtl)でエクスポートした際、全体的に色が暗くなる件について。
blenderの画面ではガンマ補正したRGB値に基づいて色を表示してるけど、objでエクスポートすると、.mtlファイル(マテリアル情報が記述されたファイル)内にはガンマ補正してないRGB値が出力されてしまう。だから、エクスポートした .obj .mtl をそのまま使うと、blender上での見た目より色が暗くなってしまう。
故に、blenderでの見た目に近づけたいなら、.mtl内の Kd (Diffuse color) をガンマ補正してやればいい。
そんなわけで、.mtlファイルを読み込んで、Kdの値をガンマ補正して出力するPythonスクリプトを書いてみた。linearrgb_to_srgb() という関数が肝。
環境は Windows10 x64 22H2 + Python 3.10.10 64bit。
_add_gamma.py
使い方は以下。
実行すると、元の .mtl を .mtl.orig.bak にリネームしてバックアップを残してから、元の .mtlファイル名でガンマ補正後の .mtl を保存する。
二度も三度も実行しないように注意。何度もガンマ補正されて色がどんどんおかしくなってしまうので。
blenderの画面ではガンマ補正したRGB値に基づいて色を表示してるけど、objでエクスポートすると、.mtlファイル(マテリアル情報が記述されたファイル)内にはガンマ補正してないRGB値が出力されてしまう。だから、エクスポートした .obj .mtl をそのまま使うと、blender上での見た目より色が暗くなってしまう。
故に、blenderでの見た目に近づけたいなら、.mtl内の Kd (Diffuse color) をガンマ補正してやればいい。
そんなわけで、.mtlファイルを読み込んで、Kdの値をガンマ補正して出力するPythonスクリプトを書いてみた。linearrgb_to_srgb() という関数が肝。
環境は Windows10 x64 22H2 + Python 3.10.10 64bit。
_add_gamma.py
import argparse
import os
import sys
import re

# DBG = True
DBG = False


def linearrgb_to_srgb(c):
    """Gamma correction."""
    r = 0.0
    if c < 0.0031308:
        r = 0.0 if c < 0.0 else c * 12.92
    else:
        r = 1.055 * pow(c, (1.0 / 2.4)) - 0.055
    return round(r, 6)


def main():
    parser = argparse.ArgumentParser(description="Adding gamma correction to mtl file.")
    parser.add_argument("infile", type=str, help=".mtl filename")
    args = parser.parse_args()
    infile = args.infile

    if not os.path.isfile(infile):
        print("Error : Not found %s" % (infile))
        sys.exit()

    bakfile = "%s.orig.bak" % (infile)

    # read file
    with open(infile) as f:
        lines = [s.rstrip() for s in f.readlines()]

    pattern = r"^Kd (\d+\.\d+) (\d+\.\d+) (\d+\.\d+)$"
    newlines = []
    for s in lines:
        result = re.match(pattern, s)
        if result:
            r = linearrgb_to_srgb(float(result.group(1)))
            g = linearrgb_to_srgb(float(result.group(2)))
            b = linearrgb_to_srgb(float(result.group(3)))
            nline = "Kd %f %f %f" % (r, g, b)
            newlines.append(nline)
            if DBG:
                print("%s  ->  %s" % (s, nline))
        else:
            newlines.append(s)

    # backup file. rename original file
    os.rename(infile, bakfile)

    # write file
    with open(infile, "w", newline="\n") as fo:
        for s in newlines:
            fo.write("%s\n" % (s))


if __name__ == "__main__":
    main()
使い方は以下。
python add_gamma.py INPUT.mtlINPUT.mtl が、入力する.mtlファイル。
実行すると、元の .mtl を .mtl.orig.bak にリネームしてバックアップを残してから、元の .mtlファイル名でガンマ補正後の .mtl を保存する。
二度も三度も実行しないように注意。何度もガンマ補正されて色がどんどんおかしくなってしまうので。
◎ 動作確認 :
正しく変換できてそうか、PythonスクリプトでOpenGLを使って描画してみる。以下の環境で動作確認した。
各モジュールは以下でインストールできるのではないかな…。
動作確認用のPythonスクリプト。
_draw_opengl_glfw.py
使用するモデルデータ(.obj .mtl)は以下。draw_opengl_glfw.py と同階層に models/ というフォルダを作成して、その中に .obj と .mtl を入れておく。
_models.zip
使い方は以下。
動作結果。以下の順番でスクリーンショットを並べてある。
ガンマ補正してあるほうが、blender上での見た目に近い。
もっとも、照明の当て方次第で色合いはどうしても変わってしまうけれど…。
- Windows10 x64 22H2
- Python 3.10.10 64bit
- PyOpenGL 3.1.7
- PyOpenGL-accelerate 3.1.7
- glfw 2.7.0
- PyWavefront 1.3.3
各モジュールは以下でインストールできるのではないかな…。
python -m pip install PyOpenGL PyOpenGL-accelerate glfw PyWavefront
動作確認用のPythonスクリプト。
_draw_opengl_glfw.py
import glfw
from OpenGL.GL import *
from OpenGL.GLU import *
import pywavefront
import argparse

model_kind = 1

modeldata = [
    {"file": "./models/cube01.obj", "scale": 2.0},
    {"file": "./models/suzanne01.obj", "scale": 5.0},
    {"file": "./models/car.obj", "scale": 7.0},
]

SCRW, SCRH = 1280, 720
WDWTITLE = "Draw wavefront obj"
FOV = 50.0

winw, winh = SCRW, SCRH
ang = 0.0
obj = None


def init_animation(infile):
    global ang, obj
    ang = 0.0
    obj = pywavefront.Wavefront(infile)


def render(scale):
    global ang, obj
    ang += 45.0 / 60.0

    # init OpenGL
    glViewport(0, 0, winw, winh)
    glMatrixMode(GL_PROJECTION)
    glLoadIdentity()
    gluPerspective(FOV, float(winw) / float(winh), 1.0, 1000.0)

    # clear screen
    glClearDepth(1.0)
    glClearColor(0, 0, 0, 1)
    glClear(GL_COLOR_BUFFER_BIT | GL_DEPTH_BUFFER_BIT)

    glMatrixMode(GL_MODELVIEW)
    glLoadIdentity()

    glDepthFunc(GL_LESS)
    glEnable(GL_DEPTH_TEST)
    glEnable(GL_BLEND)
    glEnable(GL_NORMALIZE)

    glEnable(GL_CULL_FACE)
    glFrontFace(GL_CCW)
    # glCullFace(GL_FRONT)
    glCullFace(GL_BACK)

    # set lighting
    light_pos = [1.0, 1.0, 1.0, 0.0]

    # light_ambient = [0.2, 0.2, 0.2, 1.0]
    light_ambient = [0.5, 0.5, 0.5, 1.0]

    light_diffuse = [1.0, 1.0, 1.0, 1.0]
    light_specular = [0.8, 0.8, 0.8, 1.0]

    glLightfv(GL_LIGHT0, GL_POSITION, light_pos)
    glLightfv(GL_LIGHT0, GL_AMBIENT, light_ambient)
    glLightfv(GL_LIGHT0, GL_DIFFUSE, light_diffuse)
    glLightfv(GL_LIGHT0, GL_SPECULAR, light_specular)
    glEnable(GL_LIGHTING)
    glEnable(GL_LIGHT0)

    # obj move and rotate
    glTranslatef(0.0, 0.0, -20.0)
    glScalef(scale, scale, scale)
    glRotatef(20.0, 1, 0, 0)
    # glRotatef(ang * 0.5, 1, 0, 0)
    glRotatef(ang, 0, 1, 0)

    # set material
    glColorMaterial(GL_FRONT, GL_AMBIENT_AND_DIFFUSE)
    # glColorMaterial(GL_FRONT, GL_DIFFUSE)
    glEnable(GL_COLOR_MATERIAL)

    # draw obj
    for mesh in obj.mesh_list:
        for mat in mesh.materials:
            # glMaterialfv(GL_FRONT, GL_AMBIENT, mat.ambient)
            # glMaterialfv(GL_FRONT, GL_DIFFUSE, mat.diffuse)
            # glMaterialfv(GL_FRONT, GL_SPECULAR, mat.specular)
            glColor4fv(mat.diffuse)
            gl_floats = (GLfloat * len(mat.vertices))(*mat.vertices)
            count = len(mat.vertices) / mat.vertex_size
            glInterleavedArrays(GL_T2F_N3F_V3F, 0, gl_floats)
            glDrawArrays(GL_TRIANGLES, 0, int(count))


def key_callback(window, key, scancode, action, mods):
    if action == glfw.PRESS:
        if key == glfw.KEY_ESCAPE or key == glfw.KEY_Q:
            # ESC or Q key to exit
            glfw.set_window_should_close(window, True)


def resize(window, w, h):
    if h == 0:
        return
    set_view(w, h)


def set_view(w, h):
    global winw, winh
    winw, winh = w, h
    glViewport(0, 0, w, h)


def main():
    global model_kind

    objname = ""
    scale = 1.0
    parser = argparse.ArgumentParser()
    parser.add_argument("-m", "--model", type=int, help="Model type 0 - 2")
    parser.add_argument("-o", "--obj", type=str, help=".obj filename")
    parser.add_argument("-s", "--scale", type=float, help="Scale")
    args = parser.parse_args()

    objname = modeldata[model_kind]["file"]
    scale = modeldata[model_kind]["scale"]

    if args.model is not None:
        model_kind = args.model
        if model_kind < len(modeldata):
            objname = modeldata[model_kind]["file"]
            scale = modeldata[model_kind]["scale"]
    else:
        if args.obj is not None:
            objname = args.obj
        if args.scale is not None:
            scale = args.scale

    if not glfw.init():
        raise RuntimeError("Could not initialize GLFW3")
        return

    window = glfw.create_window(SCRW, SCRH, WDWTITLE, None, None)
    if not window:
        glfw.terminate()
        raise RuntimeError("Could not create an window")
        return

    # set OpenGL 1.1
    glfw.window_hint(glfw.CONTEXT_VERSION_MAJOR, 1)
    glfw.window_hint(glfw.CONTEXT_VERSION_MINOR, 1)

    glfw.window_hint(glfw.OPENGL_PROFILE, glfw.OPENGL_CORE_PROFILE)
    glfw.window_hint(glfw.DEPTH_BITS, 24)

    glfw.set_key_callback(window, key_callback)
    glfw.set_window_size_callback(window, resize)
    glfw.make_context_current(window)
    glfw.swap_interval(1)

    set_view(SCRW, SCRH)

    init_animation(objname)

    # main loop
    while not glfw.window_should_close(window):
        render(scale)
        glfw.swap_buffers(window)
        glfw.poll_events()

    glfw.destroy_window(window)
    glfw.terminate()


if __name__ == "__main__":
    main()
使用するモデルデータ(.obj .mtl)は以下。draw_opengl_glfw.py と同階層に models/ というフォルダを作成して、その中に .obj と .mtl を入れておく。
_models.zip
使い方は以下。
Usage:
    python draw_opengl_glfw.py [-m N] [--obj INPUT.obj] [--scale N]

    -m N, --model N     : モデル種類 0 - 2 を指定
    -o FILE, --obj FILE : .objファイル名
    -s N, --scale N     : 拡大縮小率
python draw_opengl_glfw.py -m 0
python draw_opengl_glfw.py -m 1
python draw_opengl_glfw.py -m 2

python draw_opengl_glfw.py --obj models/car.obj --scale 7.0
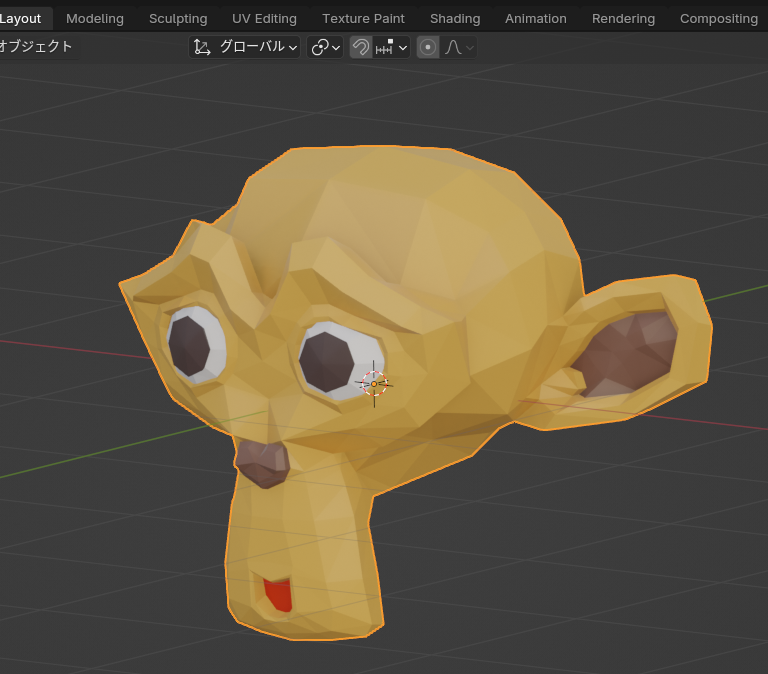
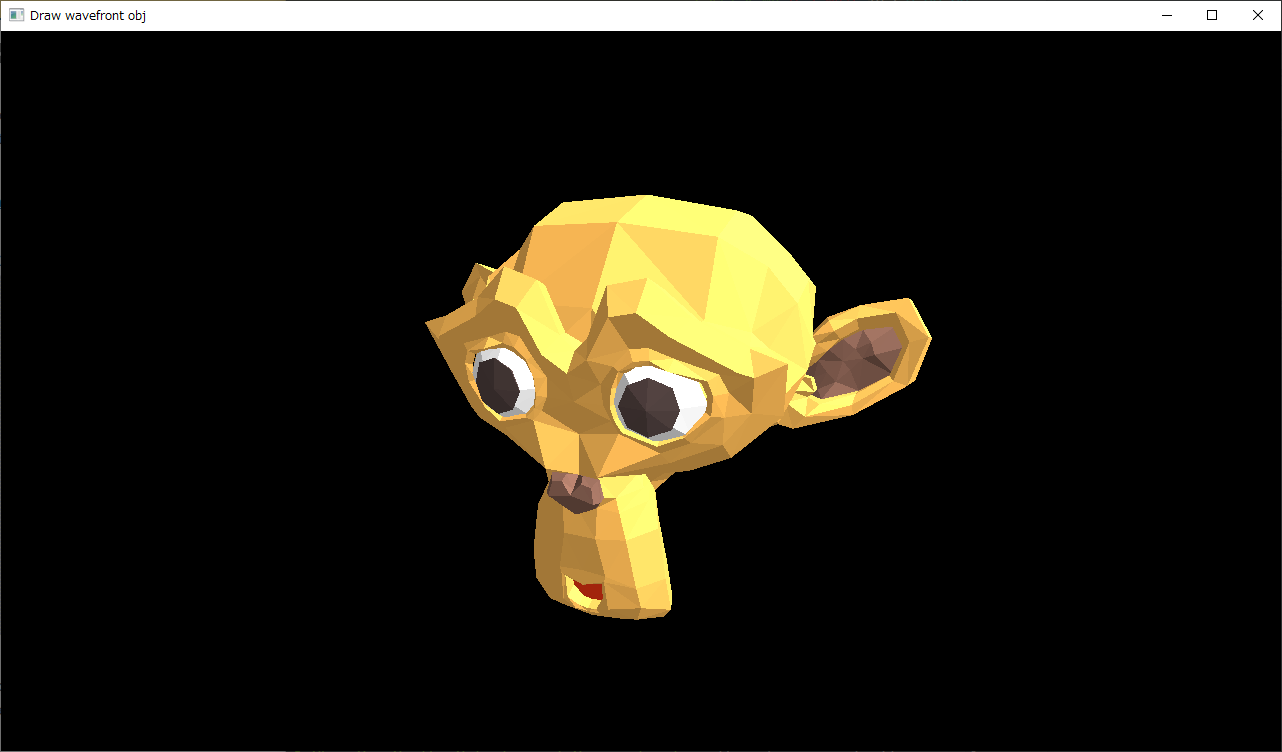
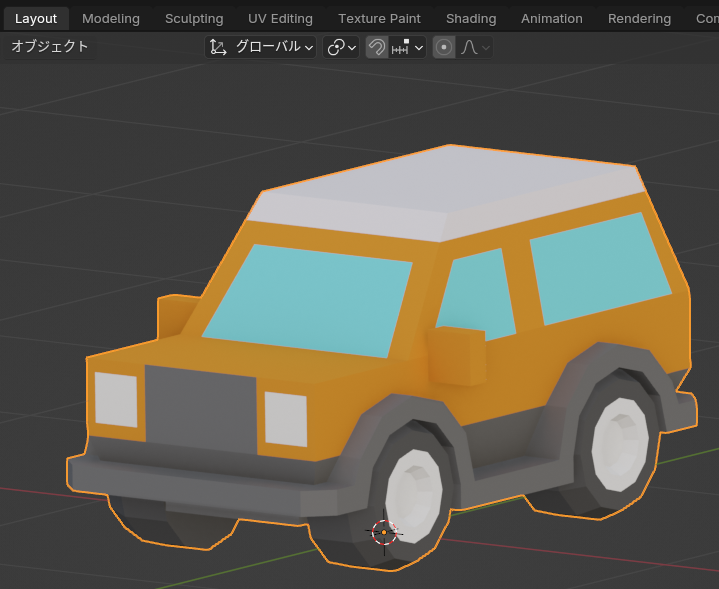
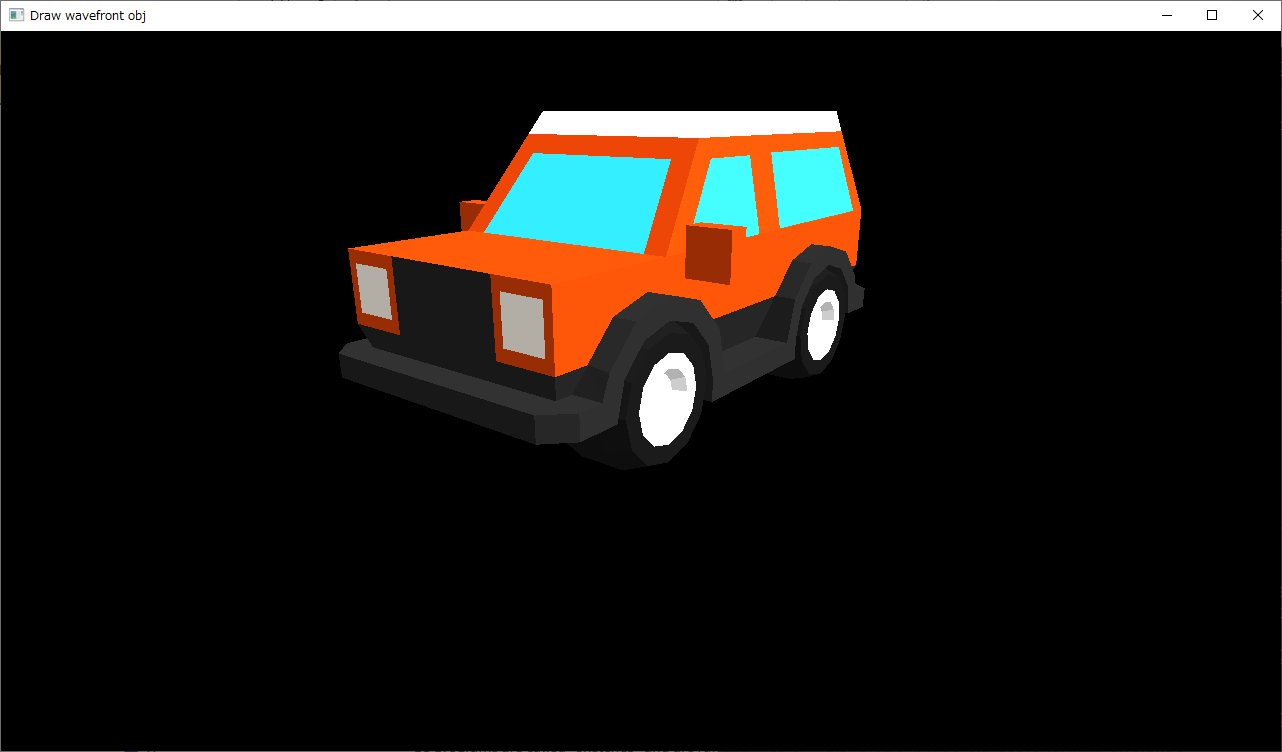
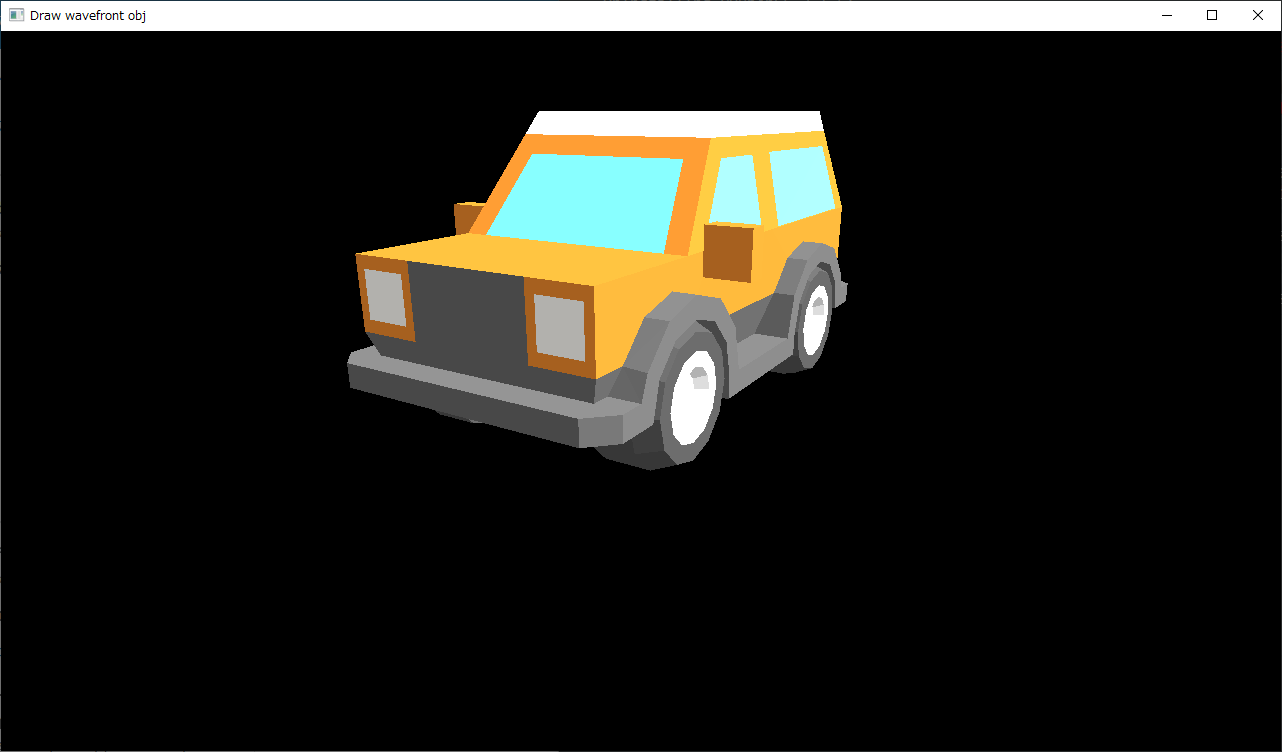
動作結果。以下の順番でスクリーンショットを並べてある。
- blenderでの表示
- ガンマ補正無しの .mtl を使用
- ガンマ補正有りの .mtl を使用
ガンマ補正してあるほうが、blender上での見た目に近い。
もっとも、照明の当て方次第で色合いはどうしても変わってしまうけれど…。
◎ 余談。PyOpenGLについて :
Python から OpenGL を利用できるようにする PyOpenGL は、pip でネット経由でインストールすることもできるけど。
その版にはGLUT関係の dll が入ってないようで、もしかするとGLUTを使ったスクリプトが動かなかったりするかもしれない。
その場合は、非公式版パッケージを入手してインストールして使うのもアリかも。非公式版なら freeglut.dll 等も入ってる。
_Releases - cgohlke/pyopengl-build
_Ultravioletrayss/OpenGLfile
_cgohlke/pyopengl-build: Build PyOpenGL wheels for Windows
Python 3.10.10 64bit の場合、PyOpenGL-3.1.8-cp310-cp310-win32.whl か PyOpenGL-3.1.7-cp310-cp310-win32.whl、PyOpenGL_accelerate-3.1.7-cp310-cp310-win32.whl を入手してインストールすることになる。
まあ、ネット経由でインストールして使えているなら、それに越したことはないけれど…。
python -m pip install PyOpenGL
その版にはGLUT関係の dll が入ってないようで、もしかするとGLUTを使ったスクリプトが動かなかったりするかもしれない。
その場合は、非公式版パッケージを入手してインストールして使うのもアリかも。非公式版なら freeglut.dll 等も入ってる。
_Releases - cgohlke/pyopengl-build
_Ultravioletrayss/OpenGLfile
_cgohlke/pyopengl-build: Build PyOpenGL wheels for Windows
Python 3.10.10 64bit の場合、PyOpenGL-3.1.8-cp310-cp310-win32.whl か PyOpenGL-3.1.7-cp310-cp310-win32.whl、PyOpenGL_accelerate-3.1.7-cp310-cp310-win32.whl を入手してインストールすることになる。
まあ、ネット経由でインストールして使えているなら、それに越したことはないけれど…。
[ ツッコむ ]
以上です。
