2014/01/27(月) [n年前の日記]
#1 [dxruby] タイトル画面をグネグネするアレを書いてみたり
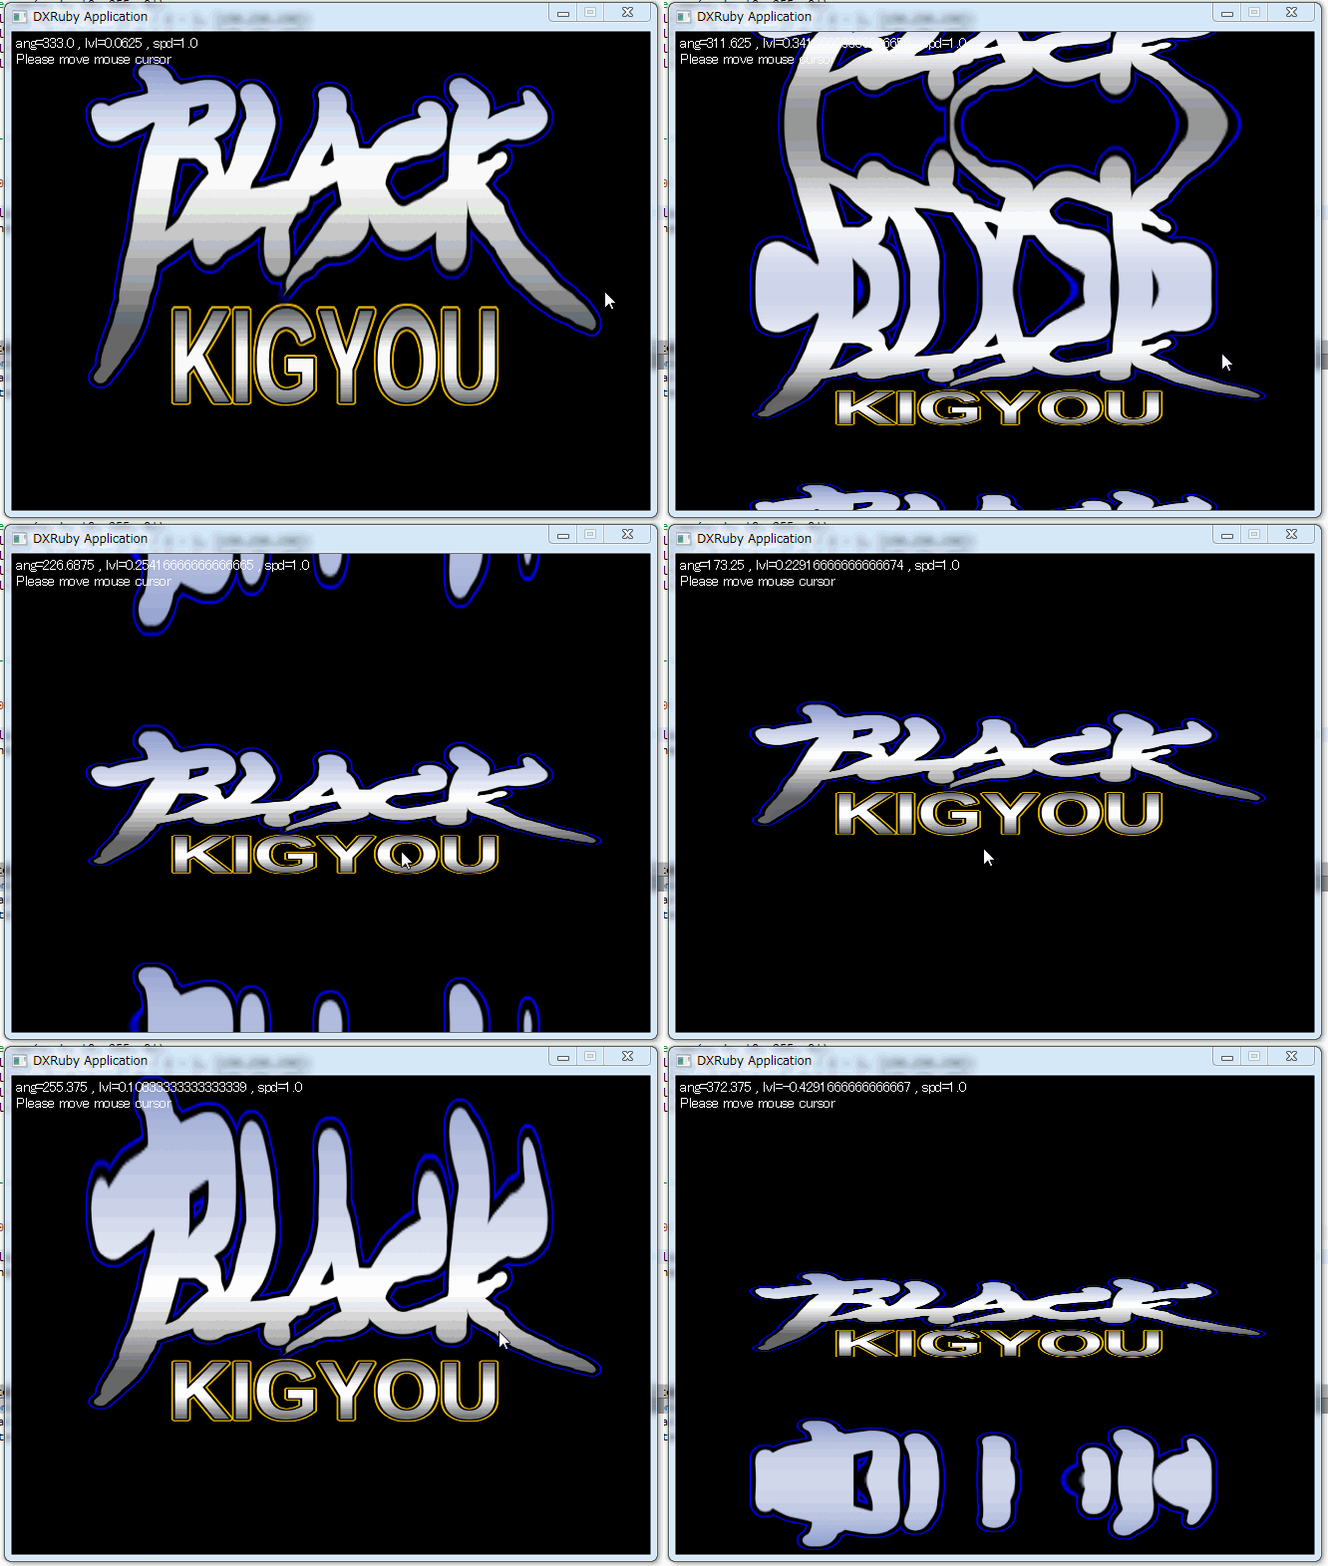
DXRuby の Shader を使って、タイトル画面がグネグネするアレを書いてみたりして。
与えるパラメータの適切な値がよく分からなくて、オリジナルのソレとはどうも動きが違うのですけど…。それでもまあ、原理と言うか、仕組みとしては、こういう感じなのかなと。
_mbraster.rb
_logo.png
スクリプト単体でも実行できるけど、他のスクリプトから呼び出して使うこともできるはず。
スクリプトも画像も、Public Domain / CC0 ってことで。
与えるパラメータの適切な値がよく分からなくて、オリジナルのソレとはどうも動きが違うのですけど…。それでもまあ、原理と言うか、仕組みとしては、こういう感じなのかなと。
_mbraster.rb
require 'dxruby'

#
# Shaderを使ってMETALBLACKのタイトル画面っぽい処理をするクラス
#
class MbRaster

  @@hlsl = <<EOS
  float ang;
  float lvl;
  float spd;
  float alpha;
  texture tex0;

  sampler Samp = sampler_state
  {
    Texture =<tex0>;
    MinFilter = LINEAR;
    MagFilter = LINEAR;
    MipFilter = LINEAR;
    AddressU = WRAP;
    AddressV = WRAP;
    // AddressV = BORDER;
  };

  struct PixelIn
  {
    float2 UV : TEXCOORD0;
  };
  struct PixelOut
  {
    float4 Color : COLOR0;
  };

  PixelOut PS1(PixelIn input)
  {
    PixelOut output;
    // input.UV.x = input.UV.x + sin(radians(input.UV.x * 360 * spd + ang)) * lvl * 0.25;
    input.UV.y = input.UV.y + sin(radians(input.UV.y * 360 * spd - ang)) * lvl;
    output.Color = tex2D( Samp, input.UV );
    output.Color.a *= alpha;
    return output;
  }

  technique MbRasScroll
  {
   pass P0
   {
    PixelShader = compile ps_2_0 PS1();
   }
  }
EOS

  attr_accessor :core, :shader, :image, :w, :h, :tilew, :tileh
  attr_accessor :rt, :rt_w, :rt_h, :rt_scaley

  #
  # 初期化処理
  #
  # @param [Image] image 使用する画像
  # @param [int] w 描画横幅。nilならウインドウ横幅
  # @param [int] h 描画縦幅。nilならウインドウ縦幅
  #
  def initialize(image, w=nil, h=nil)
    self.core = Shader::Core.new(@@hlsl,
                                 {:ang=>:float, :lvl=>:float,
                                   :spd=>:float, :alpha=>:float})
    self.shader = Shader.new(self.core, "MbRasScroll")

    @image = image
    @w = (w == nil)? Window.width : w
    @h = (h == nil)? Window.height : h

    # 画面を覆い隠すタイル数を求める
    @tilew = @w.quo(@image.width).ceil
    @tileh = @h.quo(@image.height).ceil

    # RenderTarget の必要サイズを求める
    @rt_w = @image.width * @tilew
    @rt_h = @image.height * @tileh

    # y方向で拡大縮小して描画縦横幅に合わせる
    @rt_scaley = @h.quo(@rt_h)

    # Rendertarget生成
    @rt = RenderTarget.new(@rt_w, @rt_h)
  end

  #
  # 描画処理
  #
  # @param [int] x 描画位置x
  # @param [int] y 描画位置y
  # @param [float] u 横方向スクロール位置
  # @param [float] v 縦方向スクロール位置
  # @param [float] ang sinの開始角度。単位は度
  # @param [float] lvl sinの振幅幅
  # @param [float] spd sinの角度変化量
  # @param [Hash] opts オプション
  # @option opts [int] z 描画奥行情報
  # @option opts [float] alpha 透明度。0.0で透明。1.0で不透明
  # @option opts [Object] blend 合成方法。:add や :alpha が使えるはず
  #
  def draw(x, y, u, v, ang, lvl, spd, opts={})
    alpha = (opts.has_key?(:alpha))? opts[:alpha] : 1.0
    blend = (opts.has_key?(:blend))? opts[:blend] : :alpha
    z = (opts.has_key?(:z))? opts[:z] : 0

    self.shader.ang = ang
    self.shader.lvl = lvl
    self.shader.spd = spd
    self.shader.alpha = alpha

    # Shader が参照する画像を RenderTarget に作成
    @rt.draw_tile(0, 0, [[0]], [@image], u, v, @tilew, @tileh).update

    # Shader を使って描画
    Window.drawEx(x, y, @rt, :shader=>self.shader,
                  :scaley=>@rt_scaley, :z=>z, :blend=>blend)
  end

  #
  # 動作確認用。グリッド画像を生成して返す
  #
  # @param [int] w 画像横幅
  # @param [int] h 画像縦幅
  # @return [Image] 生成した画像
  #
  def self.get_grid_image(w, h)
    image = Image.new(w, h, [0, 255, 0])
    image.box_fill(0, 0, w / 2 - 1, h / 2 - 1, [150,250,150])
    image.box_fill(w / 2, 0, w - 1, h / 2 - 1, [100,250,100])
    image.box_fill(0, h / 2, w / 2 - 1, h - 1, [200,250,200])
    image.box_fill(w / 2, h / 2, w - 1, h - 1, [0,220,0])
    return image
  end
end

# ----------------------------------------
# 以下は使用例

if __FILE__ == $0

  image = Image.load("logo.png")
  bg = MbRaster.new(image)

  x = 0
  y = 0
  u = 0
  v = 0
  ang = 360
  lvldef = 0.35
  lvl = lvldef
  spd = 1.0
  cnt = 0

  font = Font.new(14)

  Window.loop do
    break if Input.keyPush?(K_ESCAPE)

    # マウスカーソル座標でパラメータを変えてみる
    ang = Input.mousePosX * 360 / 640.0
    lvl = Input.mousePosY / 240.0  - 1.0
    # spd = Input.mousePosY / 480.0

    bg.draw(x, y, u, v, ang, lvl, spd)
    # u += 1
    # v += 2

    Window.drawFont(4, 4, "ang=#{ang} , lvl=#{lvl} , spd=#{spd}", font)
    Window.drawFont(4, 20, "Please move mouse cursor", font)
    cnt += 1
  end
end
テスト用の画像も置いときます。_logo.png
スクリプト単体でも実行できるけど、他のスクリプトから呼び出して使うこともできるはず。
スクリプトも画像も、Public Domain / CC0 ってことで。
[ ツッコむ ]
以上です。
